Tag Archives: India

Simple and Delicious Gobi Sabzi: Indian Spiced Cauliflower

indian spiced cauliflower, fried cauliflower, cauliflower sabziThere are certain foods that have the fascinating ability to transport me to another place and time.  Sometimes it’s the taste of a fragrant, freshly baked slice of bread.  One bite and I’m nine years old, back in my grandmother’s farm kitchen giggling with my cousins.  Oh how I miss my cousins…

Other times it’s one sip of a cheap keg beer at a friend’s wedding causing me to remember my college days and all the (embarrassingly fun) moments with long-lost friends whom I’ll probably never cross paths with again (even you, crazy Toby!).

And then there is is this.   Continue reading

Chicken Chapli Kabab: Pakistani Style

We, Americans, eat a lot of burgers.  Hamburgers, turkey burgers, veggie burgers…they’re all an important part of our culture.   We love pretty much anything if it’s formed into a patty, placed on a bun, and slathered with toppings.  …and who can blame us?  Burgers are good!

We also love kababs.  Meat, veggies, fruit–it doesn’t matter.  If it’s been skewered or is served on a stick, we’ll eat it, and we’ll savor every last bite.

Now, things are really going to get interesting.  I’d like to introduce you all to the spicy, tender chapli kabab!
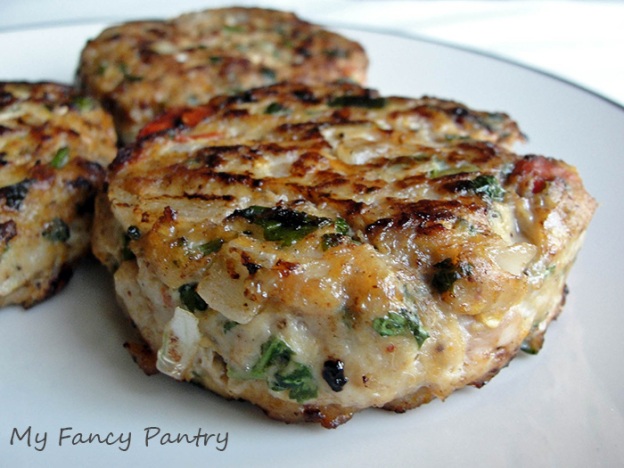
Chicken Chapli Kabab

It’s a kabab, but it’s not served on a stick.  It’s also a burger, yet it’s not on a bun.

The first time I tried traditional kababs, I’ve got to admit, I was confused.  They weren’t hunks of meat or vegetables threaded onto a skewer.  Heck, they weren’t even grilled!  Instead they were made of ground meat, studded with spices and little bits of vegetables.  They were tender, juicy, and quite unlike anything I’d had before.  I was hooked.

This version of kabab, the chapli kabab, is very popular in both Pakistan and Afghanistan.  They’re usually made with minced beef or lamb, but can also be made with chicken. The kababs get their name because of the way they’re shaped.  Piyush tried to convince me that they were called chapli kababs because they were flat like chappals (sandals), which is sort of true.

A pair of Piyush’s chappals

In actuality, they’re not named after the chappals, although it was a good guess.  They’re actually called chapli kababs simply because they’re flat.  The word chapli is derived from a Pashto (spoken in Pakistan and Afghanistan) word, chaprikh, also meaning flat.

Piyush and I first tasted the incredible chapli kababs at a Pakistani restaurant here, in Rochester.  The restaurant is called Kababs (if anyone is interested), and serves fabulous home-style food.  The food is very, very similar to authentic Indian dishes–especially dishes served in West Bengal (although the spices are a little milder, and the curries are definitely not as hot).  It’s cheap, and it’s good.

My chapli kababs were an even match, taste-wise, to what we ate at the restaurant.  The only difference is that I made mine a little thicker than they should be.

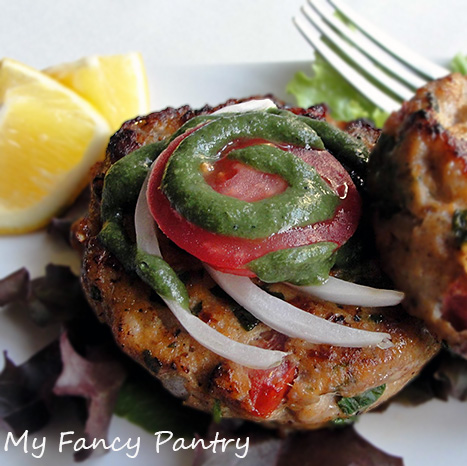
Pakistani-style Chapli Kabab topped with raw onion, tomato slice and mint/corriander chutney

I plan on making these again and again.  I can’t wait to grill these and serve them as alternatives to hamburgers at our next bbq.  Not only do they pack some incredible flavor, but they’re also pretty healthy.  Each kabab is around 140 calories, and it’s full of veggies.

I made the kababs using a pound of skinless, boneless chicken thighs.  I tossed the meat in my food processor and processed it until it was a smooth, paste-like consistency.  I then chopped a whole bunch of veggies: tomatoes, onion, green onion, serrano chilies, garlic, ginger, corriander…and tossed them all in with the meat.

I mixed everything really well, making sure to squeeze the juices from the tomatoes as I mixed–this helped keep the meat juicy and flavorful (I think…).  I added freshly ground corriander seeds (not ground to a powder), ground cumin seeds, dried pomegranate seeds, a little besan flour (chickpea) and even some crushed red pepper.  I seasoned the meat with salt and black pepper, and then formed into patties.
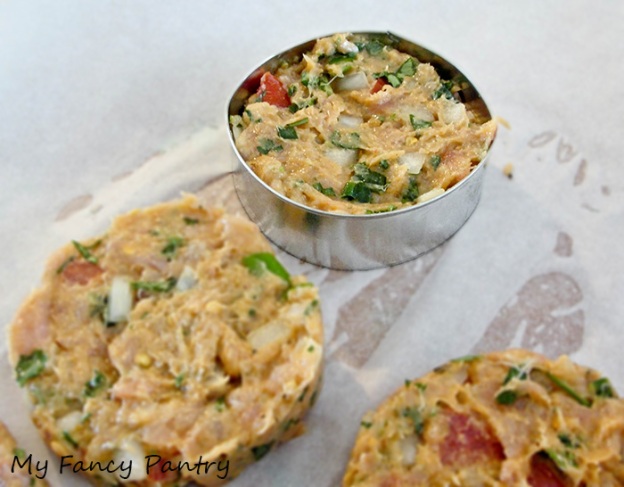
I used a pastry cutter to make the patties, mostly because I wanted them to be the same shape and size.  Also because I didn’t want to get my hands dirty after I had just washed them.  …What kind of cook am I?!

After the patties were formed, I tossed them in the freezer for about 15 minutes.  You don’t have to do this, I just find it helps hold the patties together a little better.  In fact, it seemed to work so well, I didn’t have a single patty fall apart on me.  Surprising, considering how much other stuff I had tossed in with the meat.

When I was ready to cook the patties, I put a little oil in a non-stick pan–just enough to coat the bottom.

If you’re trying to avoid oil, you could just use a non-stick cooking spray.  It should do a similar job, although you might not get that beautiful golden sear on the patties.
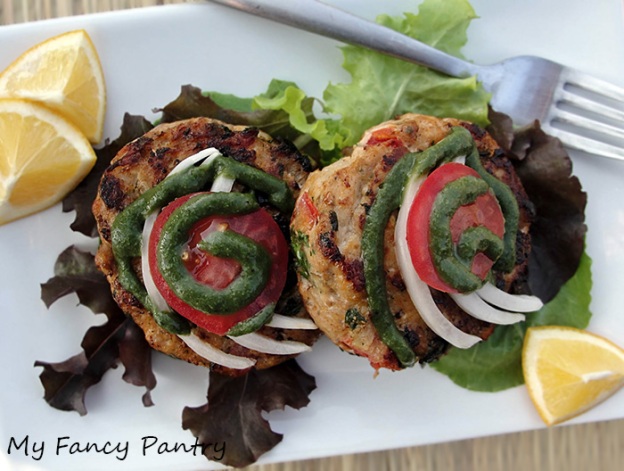
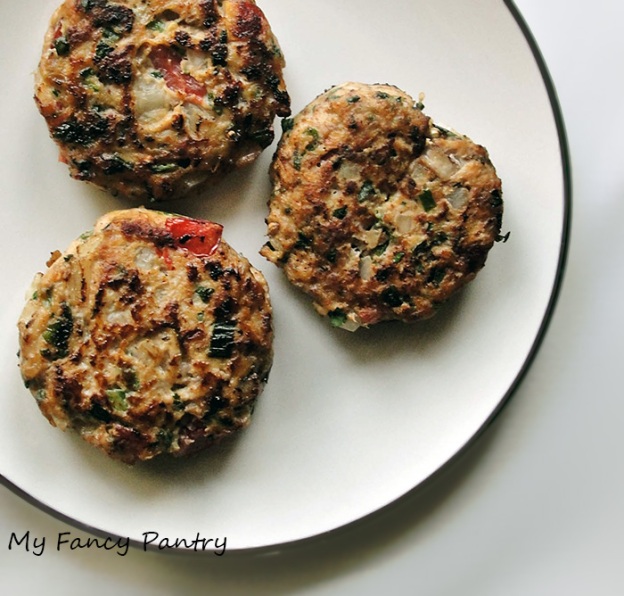
Chapli Kababs, ready to serve!

These patties were so juicy!  Chicken tends to get really dry, really fast; but I really think all the water from the veggies helped keep everything tender and moist.  This photo isn’t the best shot, but I think you can really see how juicy the kabab is.
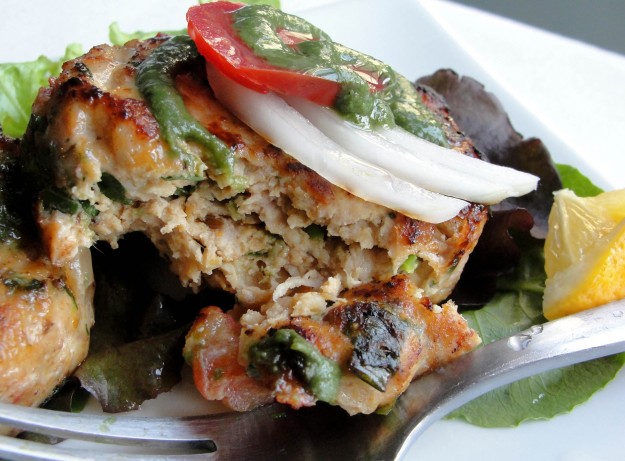
Chicken Chapli Kababs (Pakistani Style)

Makes 9 medium-sized patties

Ingredients:
  • 1 lb. skinless and boneless chicken thighs (alternatively, you can use a combo of thigh/breast meat)- minced or ground in food processor
  • 1/2 medium white onion- diced
  • 2 roma tomatoes- diced
  • 2 large green onions- chopped
  • 3 serrano chilies (may use jalapenos)- seeded and chopped
  • handful corriander leaves (cilantro)- chopped
  • 1 tbsp. garlic paste
  • 1 tbsp. ginger paste
  • 1 tsp. corriander seeds – ground, but not into a powder*
  • 1 tsp. cumin seeds- ground, but not into a powder*
  • 1 dried red chile- ground to a powder (optional.  This will make the patties very spicy)*
  • 1 tsp. dried pomegranate seeds- ground*
  • 2 tsp. besan flour (chickpea flour–alternatively all-purpose flour would work too)- more if needed to hold the patties together
  • salt- to taste
  • pepper-to taste
  • oil- for frying (I think I used about 4 tbsp. total)
* Note: Any ingredient with a * after it could be substituted by using a pre-made chapli masala mix.  This mix may be hard to find, but many Pakistani grocers (and even some Indian grocers) will carry it.
Directions:
  • If your meat is not minced, grind it in a food processor until it is broken down and is paste-like in consistency.
  • Add all chopped veggies and spices to the meat, and mix together using your hands.  Squeeze the tomatoes as you mix everything together, releasing their juices.  Mix until everything is well combined.
  • Form the meat mixture into patties.  Either roll the meat into balls and flatten with your hands or use a burger press/mold.
  • Freeze patties on parchment paper for about 15 minutes.  They don’t need to be frozen through, just cold enough that the meat sticks together better.
  • Heat oil in a large non-stick pan over medium-high heat.  Once the oil gets hot, add the patties.  Cook in batches so they are not over-crowded in the pan.
  • Cook each side for about 2 or 3 minutes, until you notice a nice golden color on the outside.  Watch the sides of the patties, once they are no longer pink or raw, your kabab should be nearly done cooking.  Total time, about 5 minutes a patty.
  • Remove cooked patties from pan and lay on a plate lined with paper towels.  Serve immediately, garnished with corriander leaves, tomatoes, raw onion, and lemon wedges.  Serve the kababs along with chutney and rice or naan.  Enjoy!
And now, because I shared Piyush’s pretty chappals, I wanted to share some of my own Indian-style footwear! …I mean, what girl doesn’t love shoes?!
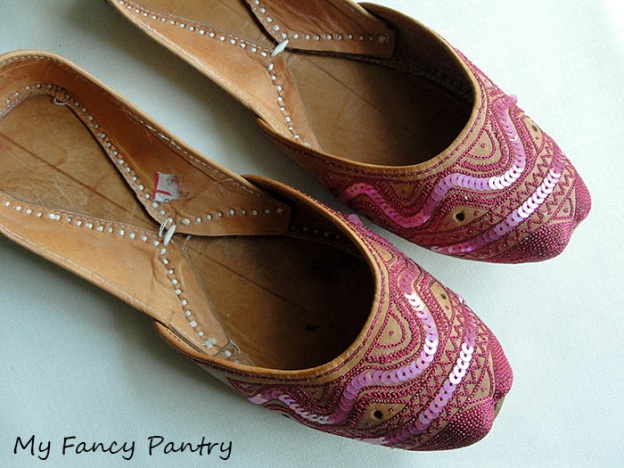
These were bought in Kolkata.  I love them, but have not worn them yet.  I’m putting it off because I know it’ll be painful (at first…).

These are my favorite, and were purchased in Amritsar, India–near Pakistan.

Yes, I really am that white. It’s sad, really. I wish I could tan…  I also have hideous feet.  They’re ugly, but they’re mine. 🙂

These shoes aren’t called chappals.  I can’t remember what they are called, actually.  They took about a month to break in (after struggling though some bad shoe bite!  They even made my feet swell HUGE), but are now my most comfortable pair of shoes.

…and since I was mentioning Pakistan, I thought I’d share a photo from the India Pakistan boarder.  This is as close as I got…You see that big white structure in the back of the photo?  That’s the entry to Pakistan.
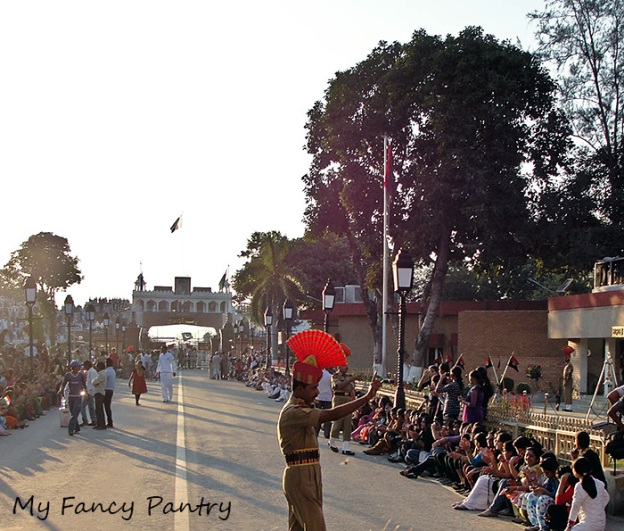
It was incredible to see all the patriotism–from both India and Pakistan.  There were tons and tons of people, lots of dancing and music, and even a peace ceremony between both countries.  It’s something I feel blessed to have attended, and I hope to attend again (although we’ll get there earlier next time.  It fills up fast, and can be really hard to see anything).

If you’d like to see the ceremony, here is a video that explains it pretty good:

http://www.youtube.com/watch?v=YeSX6AZ5xEI

Indian-Style Tea –and a Nathmulls Darjeeling Tea Giveaway!

I remember the first time I had a sip of tea. I was about 7 years old and in second grade. My best friend at the time, Anita, was spending the night and we decided to have a tea party. We raided my mom’s cupboards and found some old (antique) cups and saucers. We also managed to find a few tea bags. I didn’t know how to make tea– my parents never drank it– but we figured it couldn’t be that hard.

Anita turned on the faucet and filled the cups with hot water while I cut open the tea bags. We dumped the tea-dust into the cups of water and put them in the microwave for 5 minutes. While the tea was heating, Anita and I made a couple sandwiches–peanut butter and jelly; I believe. I remember being so excited to sit down, clink our cups together (cheers!) and drink tea. I felt like a grown up.

When our tea was finished in the microwave, we carefully took the very hot cups and placed them onto the saucers. We sat down at the table, giggling, and waited patiently for the tea to cool off enough to drink it. Once it was ready, we clinked the cups together (bad idea!…tea spilled everywhere) and took a sip.

As soon as the tea met my taste-buds, I knew tea was not for me. It was gritty and gross; and the look on Anita’s face showed me that she felt the same. We promptly dumped the tea down the sink, rinsed out our cups, and cracked open an orange Crush soda.

20 years have passed since my first experience with tea, and I’m glad to say it wasn’t my last. Now I enjoy many types of tea; sweetened and unsweetened, loose-leaf and bagged, Darjeeling and green.  Although I’ll drink nearly any kind now-days, I undoubtedly prefer the sweet– and sometimes spicy– Indian style tea.

This delicious beverage, commonly known as chai (in Hindi) or cha (in Bengali), is not the same “chai” you get if you order it at an American coffee shop (I’m lookin’ at you Starbucks!).  In America, Indian masala chai (mixed-spice tea) has become synonymous with the word chai; but chai is just a word for tea.  It’s not a type of tea…and it definitely does not come from artificial syrup (did you know that tea leaves are not even a listed ingredient on some of the syrups your favorite coffee shop uses to make your chai?).

In India, chai is most often made with black tea leaves, way too much sugar, thick, whole milk…and green cracked cardamom pods—if you’re lucky!

sweet, green cardamom pods

It can be found everywhere…and I do mean everywhere!  You can buy it for a couple rupees at the train station, served in tiny paper cups;  or along the roadsides, where scant amounts are poured into tiny earthenware vessels; and if you’re lucky enough to be invited into an Indian home, you’re sure to be offered a steaming glass of creamy chai…with biscuits to dunk!

My mother and father-in-law (Maa and Baba), taught me how to make proper Indian-style tea…and for that, I am thankful!  When preparing tea, they never really used exact measurements.  Instead, they relied on color and taste.  It took me awhile, but I think I’ve finally got it figured out (Baba, if you’re reading this…you’d be proud)!

Not only do I intend to share with you, dear reader, how to make Indian-style chai (and masala chai!), but I would also like to give you a chance to try some Darjeeling loose-leaf tea that I bought in Darjeeling, myself!  This is not the Darjeeling tea you find lining your supermarket or co-op shelves…nooo…this is the real deal!

Darjeeling Loose Leaf Tea...and a strainer! The tea was purchased at Nathmulls in Darjeeling. If you want to learn more about it click here.

If you’d like a chance at trying some Darjeeling tea for yourself, here’s your chance!  I’m having a  giveaway, and one lucky reader will receive the package of tea and tea strainer shown above!

To enter, simply leave a comment telling me how you like to drink your tea!  It’s that easy!

The giveaway ends Friday, April 6 at 7:00 p.m. Central Time.  The giveaway is only open to U.S. residents aged 18+ (sorry!).  Be sure to include a valid email address with your comment…if you win, I want you to know!  I’ll choose the winner randomly using Random.org’s random number generator.  If I don’t hear back from the winner by Monday, April 9 at 5:00 pm Central Time, a new winner will be chosen!

For an additional chance to win: Follow my blog or sign up for email updates.  Be sure to leave a comment letting me know if you did this!

If you already follow or subscribe, I appreciate it and you deserve an extra chance too!  Leave a comment letting me know!

My blog is pretty young yet…so the chances are good!

**The giveaway is now over!  Congrats, Mary Ella!  I hope you enjoy the tea!**

Now, on to the recipes!

Indian-Style Tea (with milk and sugar)

This can also be made using stevia, if you’re concerned about your sugar-intake.  I also make it with soymilk.  If you choose to do this be sure to add the soymilk at the end.  Don’t boil it, it will curdle!

This recipe yeilds 3- 80z. servings.

  • 2 c. water
  • 1 tbsp. loose leaf tea
  • 3 green cardamom pods, cracked (optional)
  • sugar, to taste (if you want the whole “Indian experience” toss in about 3 tbsp–seriously.)
  • 3/4 c. milk (whole milk, if you want to keep it real)

Directions: 

  • Heat 2 c. water in a small pot over med-high heat until it’s rapidly boiling.  Once it’s boiling, toss in the tea leaves (and a couple cardamom pods, if you want), cover the pot, and turn off the heat.  Let the tea steep for about 5 minutes.
  • Add sugar–to taste –and milk.  Stir to combine everything.  Turn heat back on and bring the tea back to a boil.  Once it boils…it’s done!  Don’t cook it for too long or it’ll turn a little bitter and taste funny.  Turn off the heat, strain, and enjoy!

Masala Chai

To make masala chai–  follow the same recipe and method as above, but also add:

  • small chunk of ginger, smashed (use as much as you would like, but remember…it’s strong!)
  • 1 bay leaf
  • 4 green cardamom pods, crushed
  • small sliver of cinnamon
  • 4 peppercorns
  • 3 cloves

Add these spices, whole, to the water when you add the tea leaves.  Experiment with the quantities of spices and find the mix that is just right for you!  …Everyone’s tastes are different!

If you want to make the chai really special for someone, add a whole cardamom seed to the bottom before straining the tea into the glass!  If you could say, “I love you” using spices…this is how you’d do it!

A spice-y surprise!

Enjoy!

Vegetarian Momos! …and Remembering Darjeeling

While on our trip to India, Piyush and I met tons of incredible people, visited many spectacular places and tried many different foods (well…different to me!).  I didn’t really think too much about it while I was there, but now that I’m back home in the states…I can’t get Darjeeling out of my head!

Darjeeling is a beautiful town located in the foothills of the Himalayas, very close to both Nepal and Tibet.  It’s a major tourist destination, and like most everywhere in India…it’s crowded!

A street in Darjeeling

Tibetian Monks in Darjeeling

One of many Darjeeling Tea Estates

Darjeeling is also quite famous for the fabulous tea grown all along the hills…and for the momos!

I only ate momos twice while we were on our little holiday, but gosh, they were so good that I wish I would have had them every day!  Oh, the things I take for granted…

Have you ever heard of momos?  No?  Probably not.  I know I hadn’t before our trip.  I don’t know if there are many places in the states where you can find sub-par momos— let alone the authentic, delicious momos.  The closest you might get is a potsticker or dim sum, which although very similar, are not momos.

So what exactly is a momo?

It’s quite simple, really.  A momo is basically a dumpling made with a flour/water based dough.  They are native to Nepal and Tibet, and are very popular in the North-Eastern part of India.  Inside the dough is a mixture of veggies, meats (optional) and aromatics. They can be steamed, fried and even boiled in soups.  It’s amazing how something so basic can be so versatile, so tasty…and so addicting!  After doing a little searching online, I found a couple recipes that looked promising.  I took a few things from each recipe and came up with something that tasted almost exactly like I remembered.

In fact…they turned out so good, Piyush ate 8 of them in less than 10 minutes—and then he licked the plate!

The only piece of criticism he gave me was that I made my momos larger than I should have. Mind you, there is nothing wrong with making them large, the taste is the same; but they’re meant to be more “bite-sized” than “hockey-puck-sized.”

formed momo, before steaming

My recipe will make approximately 30 large momos—you could probably get 45 or 50 if you make them a little smaller.  Out of curiousity I plugged my final recipe into a calorie calculator, and guess what?!  Each large sized momo is around 85 calories!!!  Awesome!!!

The dough is easy to make.

  • 3 c. all purpose flour
  • 1/2 tsp. salt
  • 1/2 tbsp. baking powder
  • water —enough to make an even, stiff dough.

Pour the flour, salt and baking powder in a bowl.  Add 1 cup of water to begin.  Don’t use a spoon to mix, use your hands!  Knead the dough, adding flour and water as necessary.  I probably ended up using 3 1/5 c. flour and around 1 1/2 cups water—-but this will vary!

Cover the dough and let it rest for around 30 min. (I managed to wait 20.  Patience is not something I possess…)

While the dough rests, make the filling.

  • 1 medium red onion, diced
  • 3 cups cabbage– finely shredded (I bought it in a bag, pre-shredded.  I hate shredding cabbage!  Hate it!)
  • 1 large carrot, grated
  • 1 1/2 tbsp fresh ginger, smashed and minced
  • 1 giant potato (or 2 medium)—made into around a cup of mashed potato
  • 1 1/2 tbsp chopped cilantro
  • 1 1/2 tsp salt
  • 1 tsp Kalaunji seeds (substitute cumin seeds, mustard seeds, or leave out all together)
  • 4 tbsp. extra virgin olive oil
Mix the onion, cabbage, carrot, ginger, cilantro, salt and mashed potato in a bowl.  Stir it until everything is combined.  Heat the olive oil on the stove-top and pour the kalaunji seeds in and once they start to pop, dump all the oil/seeds in the veggie mixture.  Stir everything until mixed together, and set aside.
Next, take the dough and pinch off little balls—about 1 tbsp.  Roll the balls out into a some-what circular shape.

Roll the dough out (make them smaller if you're making bite-sized momos)

Pick the dough up in your left hand and plop a good heaping tablespoon of filling in the center.

Next, start crimping the edges and form the momo into  a circular shape.

crimp and pinch the dough around the filling

Ready to be steamed!

***Make sure you keep a damp towel over the momos and the dough as you’re forming them.  You don’t want the dough to dry out. ***

Once you get the momos all formed, you can either steam them right away or you can freeze them.  I froze all of mine because I wasn’t sure when Piyush would be home to eat them.  I placed them on a parchment paper lined baking sheet, popped them in the freezer and let them stay there a couple hours.  Once they were fully frozen I put them into a giant ziplock bag, and back in the freezer.

When you’re ready to steam them:

Put water in a steamer pot and bring to a boil.  Place the steaming basket(s) in the pot.  If the water touches the basket, pour a little out.

Once the basket is in the pot, spray it with a little cooking oil (I used my misto)—you don’t want the momos to stick!  Work in batches, and place momos in the basket in a single layer so they don’t quite touch.

Set the timer for 15 minutes and don’t take the lid off the pot until it buzzes.  Resist the temptation.  Once the timer goes off, take them out of the steamer and serve with some soy dipping sauce, chile sauce, or tomato chutney!

Enjoy a little bit of Darjeeling, half a world away!

Have you ever visited some place that was so amazing, it left you wishing you could go back?  I have heard quite a few people who have been to Darjeeling say that they would love to retire there.  I can totally understand!

Enjoy a couple more photos!

Baba enjoying some Darjeeling tea