Category Archives: Food

Winter Jammin’… Strawberry Lavander Jam

Making jam and jellies is something I really enjoy.  I’m not really sure why, but when I’m making jam or jellies I feel so relaxed and all the sudden I have all the patience in the world (which says a lot, usually I have the patience of a 3 year old).  I do most of my canning and preserving in the late spring through early fall, probably similar to most people.  But the other day I was thinking…why not winter?  Sure, I guess the logical and most obvious answer would be:  no fresh produce, but that wasn’t a good enough reason for me.  I mean, I froze tons of berries at their peak of freshness and if they’re good enough for smoothies and pies why wouldn’t they be good enough for jam?

Oh, let me tell you…they were!

Christmas is coming up and I thought a variety of homemade jams, jellies and preserves would make awesome gifts.  Give my family the gift of summer…in the middle of the winter, you know?  That beats unwrapping an Ipad anyday!!!

I  took approximately 4lbs of strawberries out of the freezer (this will yield around 5 cups of fruit/juice when thawed).  Then I got this brilliant idea…what if I added lavender to the jam?  I’m always looking for an opportunity to add lavender to everything and anything I possibly can.  Some would say I’m obsessive (I’m lookin’ at you, husband!).

Love--- in a jar

I googled a few recipes and found that I’m apparently not the only one who decided strawberries and lavender would make a perfect pair, as it’s been done many, many times.  Some of the recipes were more confusing—or time consuming— than I wanted, so I simply ground up 2 tablespoons of lavender buds (you can find these at co-ops and most specialty grocery stores.  I also grow my own.) and rubbed it into the sugar—making lavender sugar!  Then I followed the directions on the box of pectin I bought.  So easy! I don’t always use pectin when I make homemade jams, but this time I wanted to be certain it’d set up well in time for Christmas.

Soon enough, I had 12 beautiful jars of homemade jam!  The lavender flavor was a little overwhelming, so next time (and there will be a next time!) I think I’ll probably cut back the amount of buds to about 1 tbsp.  The aroma of the jam is incredible!  Strawberries and lavender were meant for one another!

And just in case you were wondering, no one would ever be able to tell I used frozen berries.  It definitely tastes like summer in a jar!

I can’t wait to tackle some of those frozen blueberries next…

Indian Dinner in an Hour!

Today I woke up craving Indian food.  It’s been awhile since I’ve had a really amazing, homemade Indian dinner.  Too long, actually.  As good as the Indian restaurant can be, it never really hits the spot entirely.  Last time we were there, all I wanted was lamb curry; and that’s what we ordered.  But what we got was overcooked lamb in a so-so gravy.  Not at all amazing.   Piyush and I left with full tummies but we were both a little lot disappointed.  Sometimes I just don’t want to cook though…and most of the time I regret it. Continue reading

Great Day to Pick Some Grapes!

The weather here in Minnesota has been really nice the past few days.  It’s been in the 80’s, and feels much more like summer than fall!  I have so much yard work to get finished before we leave for India and this weather has been perfect for it, but I haven’t done any!  Nope.  I haven’t picked up a rake or touched my shears.  I haven’t pulled out the tomato plants from the garden nor have I mulched anything.  Instead, I decided I wanted to buy some grapes and make jelly.  I never actually got around to making the jelly yet (are you surprised?!), but I did make nearly 30 cups of concord grape juice!

After searching online for concord grapes, I was surprised that I could find them right here in Rochester!  I ran a few errands and then plugged the address into my phone.  It was a little outside of town, but very easy to find.  The farm is called Firefly Berries (you can check out there website HERE).  I’ve never picked grapes before and didn’t have any idea what to do, how to tell if they were ripe, or how many I would need to make some jelly and juice.  The lady that helped me was very nice and answered all my questions.  Picking the grapes was kind of fun and it went really quickly.  I picked 17lbs of grapes, and at $1.00/lb, I thought it was a good deal!

I also bought a container of the juice they make there.  I thought Piyush would really like it.  I wasn’t sure exactly how much juice I would get from the grapes I had bought and wanted to make sure we could enjoy some fresh concord grape juice when I was done making the jelly.  I’m not a juice drinker really (probably why that juice diet never really stuck all that well), but concord grape juice is probably the only one I crave once in awhile.  I usually just want a taste.  Man!  The juice they made was awesome!  I can’t wait until next year when I have some time to put up a bunch of grape juice myself.

Once I got the grapes home I became a little terrified of all the bugs hanging out in that box with them.  I didn’t want any bugs or spiders (eeeekkk!) coming inside my house so I got a few bowls and set everything up on the trunk of the car.  I started pulling the grapes off  and sorting through them.  This is when I started wishing Piyush was home because I desperately needed someone to take care of all those bugs!  There were a lot more than I had expected, but I realize that I intruded on their habitat and they weren’t there just to annoy me, so I probably shouldn’t complain too much.  I don’t like to kill them and I don’t like to touch them, so I’m sure my neighbors were laughing at me dancing around in the garage with a stick in my hand trying to coax them away.

They were everywhere!

I survived, thankfully, and then left my bowls of beautiful grapes in the garage while I filled the sink up with water.

I figured that soaking them this way would clean them real good and also allow for any stems (and bugs!!!) to float to the top, where I could skim them off.  It worked well.

I tried using my juicer, but realized it would take forever. Seeds kept shooting back out of the top at me whenever I took the plunger out to put more grapes in.  It just wasn’t going to work.  So I pulled a big pan out of the cupboard and filled it with about 3lbs of grapes and 1 1/2 cups of water.  I smashed the grapes and cooked everything until it boiled.  Once it boiled, I reduced the heat and cooked it for roughly 10 more minutes.  I then dumped everything into a sieve to separate out the juice from the skin, pulp and seeds.  Once the juice was separated I poured it into large jars that went into the fridge.  Making juice this way also took quite awhile, but I enjoyed it.  We ended up with approximately 30 cups of juice!  That’s enough to make about 48 cups of jelly!!!  I don’t think we need that much.  I put some in a pitcher to drink (strained it through a cheesecloth and added some water until I was satisfied with the taste).

I also made a grape cake this morning when I got home from the gym (it’s cooling now, so hopefully I’ll have a post up about it soon!)  For the rest of the juice, I’m going to give some to a couple friends and then freeze the rest for when the “jelly makin’ bug” bites me in the middle of winter…and I know it will!

Oh!  One other thing I learned today about concord grape juice:  Do not give it to a 1 1/2 year old—no matter how much you dilute it (and I diluted it a LOT!)—when you are babysitting.  They will get a major sugar high and act like a crazy animal! And definitely do not give it to them in a sippy cup, even if the sippy cup says “leak proof”.  It will most definitely leak, and grape juice is really hard to clean up (especially on white cupboards!!!)!

Piyush and I were watching my niece, Madelyn, while my sister and brother in law went out for dinner and to a movie.  She’s so cute and I love spending the day with her, but Piyush was definitely not ready to keep up with all her energy.

Madelyn loves picking cherry tomatoes off my decrepit plants. She picked a bowl full last week too.

It was hard to get a photo when they were both looking at me...this is the best I could do.

By the time my sister and Brian got back from their movie (at around 10pm), Madelyn was still going strong…and Piyush was ready to pass out!  It was kind of funny.  But lesson learned.  No more grape juice for Madelyn!

Not So Fancy Frittata

We eat a lot of eggs in this household.  They probably comprise about 25% of our meals, now that I think about it, and we always have a dozen or two on hand. When we want some food quickly and I don’t feel like standing over the stove for hours and hours on end (am I being a little too dramatic?), I can usually crack a few eggs and have supper finished in no time (I can also crack a few eggs and have some cookies…or creme brulee in no time too, but that’s another story!).

Aside from being convenient, eggs are also quite beautiful in that they’re so diverse.   I can’t think of any other ingredient that can be prepared over 100 different ways, taste completely different, and you can still recognize what it was in its original form.  How beautiful is that!?

I didn’t really feel like cooking a nice dinner tonight.  It’s my day off.  I had absolutely nothing planned today.  It’s not often that I have no idea what to do with myself, and although I could have spent all day making some fabulous food…I just didn’t want to.  Before you start thinking about how lazy I am, let me just reassure you that I did change out of my pajamas.  I brushed my teeth too!  I even made it out of the house today, and managed to do the dishes!  So, the day wasn’t lost completely.  I mixed up some bread and I even went thrifting.

I love thrifting.  You never know what you might find.  Once, a couple months ago, I found a Le Crueset Bistro Grill Pan.  This pan retails for around $120, and it’s been on my wish list since I discovered my love of cooking.  It was calling to me as soon as I walked through the doors of the store, and begged me to save it from being surrounded by mismatched storage bowls and containers full of butcher knives (scary!).  The pan looked pretty new, like it had been used once and the previous owner had no idea how to properly clean it, is my guess.  It was even the same color as my cast iron pan (awesome!).  But the best part, it had a price tag of $2.50.  SOLD!  Today I didn’t find anything nearly that cool, but I did get a new winter jacket.  Okay, not new…but new to me!  It’s at the dry cleaner as we speak.  I also found Piyush some new golf shirts.  They still had the tags on them and were major brand name steals.  $4 for a $90 dollar shirt…tags still attached, yes please!  Anyway…

When I got home I realized that the bread dough I had mixed together was ready to be shaped.  It had risen so much that it was like 6″ taller than the bowl.  Oops!  Luckily I had covered it with plastic wrap before I put the lid on so it didn’t get all crusty.  Piyush got home from golfing so I asked him to help me.  Afterall, the rolls were actually for him to take to work tomorrow to share, so I thought it was appropriate for him to learn how to shape buns.  He did a good job!

While the rolls rested for their final rising, I threw dinner together.  I’ve never made a frittata but it sounded good and was even healthy (not to mention cheap!)  You could really add anything you wanted to the frittata, it’s definitely nothing fancy.  I used some ham that I chopped up, a carton of mushrooms, arugula, some herbs I had laying around and goat cheese.  Oh how I love goat cheese!

I sauted the ham, mushrooms and arugula in a little olive oil until I was satisfied with their doneness.

Then, I added 6 eggs that I had beaten with a little salt, pepper and cheese into the mix.  I let it cook until it just began to set, then popped it into the oven which was set on “broil”.   This dinner came together so quick, probably less than 15 minutes.  When it was done I cut it into 8 triangle pieces.  It looked like an egg pizza!

It was awesome!  It was also so filling that I only had one piece.  That leaves leftovers for breakfast/lunch tomorrow!

Oh, yeah...I also had a hot roll with a little jam!

What’s your favorite way to eat eggs?

Braised Pheasant with Red Cabbage and Wild Rice

I come from a family who loves to hunt for their food.  Saturdays and Sundays during the fall were spent walking the fields around SE Minnesota, with dogs in tow, trying to flush out birds.  …Pheasants, to be exact.

This is Titan. He's a britany spaniel. He's one of many, many hunting/family dogs we've had through all the years

I never really enjoyed hunting and only went with a few times (I never actually carried a gun…and if I would have, I would have never been able to point it at something to kill it.  That’s just not something I could do).   Most of the times that I tagged along, I was more of an annoyance for my dad than anything.  I hated that I had to be quiet, I didn’t like that you couldn’t eat anything for hours on end, and I despised that I was really expected to go to the bathroom behind some trees?!?!  I also didn’t enjoy when I’d be walking along, minding my own business, and all the sudden a pheasant would fly up right in front of me!  That is scary!

Aside from not enjoying hunting, I also refused to eat any of their kills.  Infact, this extended to me refusing to eat fish as well.  I just could not bear to see an animal being shot, skinned, caught or filleted.  I was kind of a hypocrite though.  I’d eat beef and chicken without ever questioning how it got on my plate.  My mom would often cook venison and pheasant and tell me that it was beef or chicken.  She knew I liked the taste, but if I knew the truth, I would not touch it. This lasted for years.

Eventually, when I was in college, I began to eat venison occasionally…and I loved it!  I also started eating fish again.  I still refused the pheasant. But last year my brother in law went pheasant hunting for the first time,

Brian, after his first hunting adventure

he got 2 birds and gave one to Piyush.  Piyush has never eaten pheasant and really wanted to try it, so I agreed to fix it for him.  …I put the bird in the freezer, where it has been haunting me ever since.

The truth is, this is the first time I have knowingly eaten pheasant since I was probably 10 years old.  It is also the first time I have ever cooked it.  Mom always put it in the slow cooker with some veggies, but I didn’t really want to do that.  So I turned to google.  Not very many recipes turned up, and so I decided to search epicurious.  Success!  I found a recipe for “Braised Pheasant with Red Cabbage Wild Rice”.  This sounded delicious!…but then again, anything with wild rice sounds delicious to me!

I have to say, this recipe was incredibly time consuming.  You have to be a good multi-tasker (thank god, I am) for this to be a success.  It also uses a lot of pans and utensils, so aside from having awesome multitasking skills, you should also have extraordinary dish washing abilities.  Believe me, you’ll need them!

I followed the recipe for the most part, but had to make a few substitutions.  I also noticed that the recipe had some major problems—mainly involving the wild rice.  It called for 1 cup of water to 1/2 cup of rice.  Now, if it was regular white rice, this would not be an issue.  But wild rice is not white rice.  It needs approximately 4c of liquid to ever 1c of rice.  The recipe also says to bake the rice.  I did as I was told, but I did not like the results and would totally do it differently next time.  I’d boil the rice, uncovered, on my stove top.  Rice aside, this recipe was pure gold!  The flavor was tremendous and I could imagine ordering this at a high class restaurant (and paying a pretty penny for it, too!).

 Braised Pheasant with Red Cabbage Wild Rice (via Epicurious)

The Recipe:

For wild rice

  • 1/2 cup wild rice
  • 1 cup chicken broth (please, increase this to 2c…at least!)
  • 1 tablespoon olive oil
  • 4 slices bacon
  • 1 small onion, sliced thin
  • 2 cups thinly sliced red cabbage (about 1/6 head)
  • 2 teaspoons red-wine vinegar ( I used a mixture of balsamic vinegar–probably 2 teaspoons, and red wine–probably a good 3/4 of a cup.  It made the flavor shine!)

For pheasant

  • a 2-pound pheasant (mine was skinless, breasts still on bone)**
  • 1 1/2 cups water (I skipped this and used chicken broth instead)
  • 1 bay leaf
  • 1/2 teaspoon salt
  • 1/4 teaspoon black pepper
  • 1/4 teaspoon ground allspice (made my own using equal parts cinnamon, cloves and nutmeg)
  • 1 1/2 tablespoons olive oil
  • 1/3 cup golden raisins
  • 1/4 cup minced shallots (about 3)
  • 1/4 cup gin
  • 1/2 cup dry white wine
  • 1 teaspoon tomato paste (I used 1/2 of a large sized heirloom tomato)
  • a 3-inch fresh rosemary sprig plus 1/2 teaspoon minced leaves (had to use dried.  Unfortunately.  I didn’t have fresh on hand)
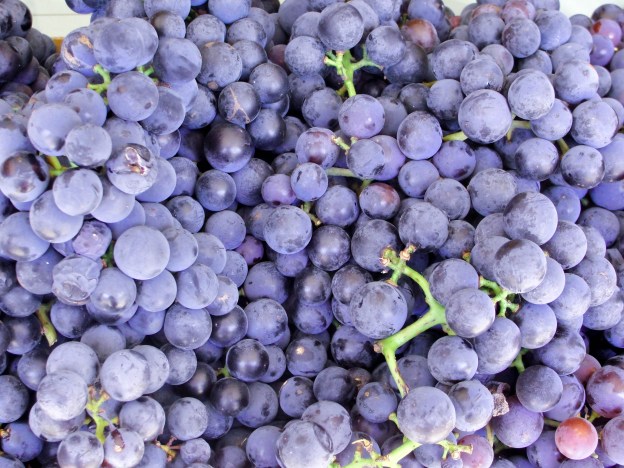
  • 1/2 cup halved red and/or green seedless grapes (I used red, and this totally made the recipe!)

**I think you could probably substitute chicken, venison, maybe even beef? for the pheasant in the recipe and it would turn out divine!

Make wild rice:

Preheat oven to 350°F.

In a fine sieve rinse wild rice well and drain. In a small saucepan bring broth to a simmer. In a small flameproof casserole Sauté rice in oil over moderately high heat, stirring, 1 minute and stir in hot broth and salt and pepper to taste. Bring mixture to a boil and bake, covered, in middle of oven 1 hour, or until liquid is absorbed and rice is tender.

While rice is cooking, in a 10-inch skillet cook bacon over moderate heat until crisp and transfer to paper towels to drain. Transfer all but 1 tablespoon drippings to a small bowl and reserve for cooking pheasant.

Heat drippings remaining in skillet over moderately high heat until hot but not smoking and sauté onion and cabbage, stirring, until softened. Add vinegar and salt and pepper to taste and sauté, stirring, 1 minute. Chop bacon. Just before serving, stir cabbage mixture and bacon into wild rice.

Again, I have to say, Please boil the rice.  It’ll turn out better.  If you insist on baking it, at least increase the liquid by about 4 times. 

Make pheasant while rice is cooking:

Rinse pheasant under cold water and pat dry inside and out. Cut pheasant into 6 serving pieces, transferring feet, back, neck, and wing tips to a small saucepan. To saucepan add water and bay leaf and simmer, uncovered, 15 to 20 minutes, or until reduced to about 3/4 cup. Strain stock through a fine sieve into a heatproof bowl.

In a small bowl stir together salt, pepper, and allspice. Pat pheasant dry again and sprinkle evenly with allspice mixture. In a 10-inch heavy ovenproof skillet heat oil with 1 tablespoon reserved drippings over moderately high heat until hot but not smoking and sauté pheasant until golden, about 5 minutes on each side. Transfer pheasant to a plate.

In fat remaining in skillet cook raisins and shallots over moderate heat, stirring, until shallots are softened. Stir in gin and boil until most is evaporated. Stir in wine and boil until reduced by about half. Stir in stock, tomato paste, rosemary sprig, and salt and pepper to taste and bring sauce to a boil.

Add pheasant to sauce, skin sides down, and braise, tightly covered, in middle of 350°F. oven until breast meat is cooked through and tender, about 10 minutes. Transfer breasts to a clean plate and keep warm, covered. Braise legs and thighs until cooked through and tender, about 10 minutes more. Transfer legs and thighs to plate and keep warm, covered. Stir minced rosemary and grapes into sauce and boil until slightly thickened, about 1 minute.

Divide pheasant between 2 dinner plates, spooning sauce over it, and serve with red cabbage wild rice.

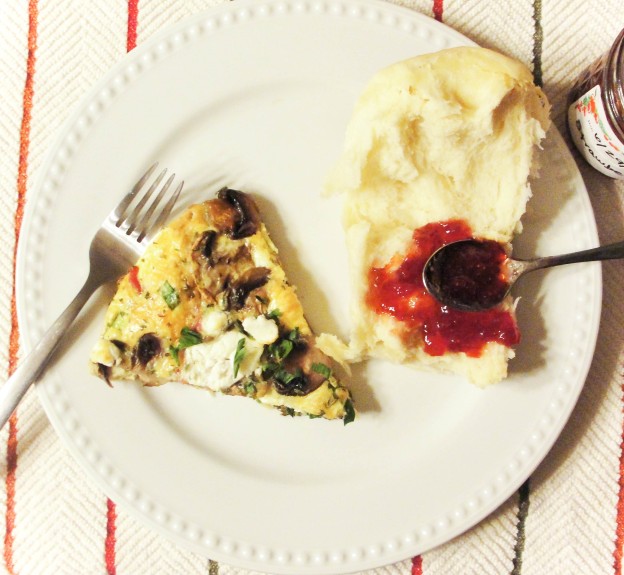
I wish my house had better lighting in the evening, because these photos don’t even do this dish justice!  It was stunning on the plate!

Fantastic!

After eating pheasant again…and not being tricked into it…I have to say, we’ll be eating this more often!  The meat was moist and had so much flavor.  It wasn’t tough at all (which is sometimes a problem with pheasant).  The grapes added at the end were brilliant!  They added a little sweetness and were flavored with that beautiful sauce.  I wish you could taste it right now!!!
I’d really like to make this for my family and see what their thoughts are.  They’ve only had pheasant in a crock pot, so I think it would be quite the change!

Cake-tastrophe Averted! “Building” a Wedding Cake

Oops...

Have you ever had such high hopes for something, that you don’t even consider the end result will be anything except for everything you ever imagined?   It happens to me a lot.  Especially when I’m decorating cakes.  I get these fabulous ideas, grandiose even, but sometimes when I start working on them…the ideas just don’t materialize.  It’s not that I don’t know what I’m doing or that I don’t have the skills or technique, but sometimes things just don’t work out.  …At least the way I want them to.

The above cake, for example, came out all busted up when I turned it out of the pan.  I greased the pan with butter, put parchment paper on the bottom and even greased that too.  It didn’t matter.  There was nothing, short of insane amounts of frosting, that would save this cake.  Luckily, the recipe had made enough batter that I had plenty left over for 2 more 6″ cakes…and this small crisis was really no crisis at all.  Instead, I had leftover cake scraps to share with my family and co-workers.  Everyone was happy.

It made me laugh, actually.  Earlier in the day I had been watching an old episode of “The French Chef.”  Julia was making sugar syrup and caramel.  I can’t remember the exact details now, but I do remember she made a mistake.  Instead of freaking out and throwing everything into the garbage she simply looked into the camera and said,

“If you’re not ready to fail, you’re not ready to cook.”

She went on to share tips on how to turn your failures into something that you had not necessarily intended, but were proud of anyway.  This way your guests would have no idea that your failure was not your intention…does that make sense?

Anyway…back to the cake.  This cake was a mini-wedding cake for one of my co-workers.  She wanted a pumpkin cake (recipe) with cinnamon brown sugar buttercream.  The only thing I was told was that it should be simple and incorporate trees and nature.  That left a lot of room for my mind to wander and it was getting a little overwhelming.  I had so many ideas…but no idea if they were the right ones!

I thought about doing pulled sugar leaves…that didn’t work out (pulled sugar is NOT easy!!!  Instead we ended up with giant leaf lollipops).  Then I thought about making gumpaste leaves and flowers, but I wasn’t really feelin’ it.  So the other day when one of my other co-workers stopped by my house to get some Chinese Lanterns to use in the flower arrangements, I asked her if she had any ideas (see her website here).  I told her I wanted to do some sort of a tree topper but wasn’t sure what direction to go in.  We brainstormed a little bit and walked around my yard collecting branches and twigs.  Since she was doing all the flowers for the wedding she said she’d make a topper to go along with all her arrangements.  It turned out incredible!  The wedding is tomorrow and its taking place in a really awesome stone barn that is about 100 years old.  It’s decorated with a fall theme, using all sorts of things found in nature during this time of year.  When I delivered the cake today I just couldn’t get over how beautiful it was!

The cake went together rather quickly and I had no other issues (tutorial coming soon!).  I was glad, mostly because I didn’t have a lot of time to do this cake and was trying to fit it in.  I was only asked about a week ago but I really wanted her to have a beautiful cake…so I made it all work :).

Piyush helped me deliver the cake today.  I was really nervous about it because the whole cake is buttercream…and buttercream is temperamental.  It also is very easy to completely wreck the decoration of the cake.  One harsh turn or one quick stop…the cake could be damaged beyond easy repair.  The place we were taking the cake to was about 30 miles away, with curvy roads,  so it was kind of a scary ride.   We made it though!  I didn’t even have to touch anything up!  I packed it in a box with towels around the cake stand to keep it from moving, and then I prayed.  Oh man…did I pray!

I tucked extra frosting and tools in the bottom of the box too.

And here, my friends, is the finished product (there will be some additional flowers tucked in around the base of the cake topper and probably around the cake as well):

How awesome are those stone walls behind the cake?!

Edited to add:

Here is the final cake, I just thought I’d share!

Brooke's wedding cake! (Thank you Brooke, for supplying me a picture!)

Potato Rolls: Bring on the Buns!!!

In my last post I mentioned saving the water that you boil your potatoes in to use for making bread.

I didn’t know if I would have time today to show you want to do with it.  I had some serious cake baking that needed to get done and even though I’m a super duper multi-tasker I didn’t want to bite off more than I could chew (haha!).  Well, I got into a cake bakin’ groove and figured that whipping up a quick batch of buns would be no problem.  I love baking bread.  I would even go as far as to say that I love baking bread more than I love eating bread…and that says something! 🙂

My grandma R. makes fabulous bread.

Grandma R., the ultimate bread baker.

Some of my earliest memories are of her taking the rolls out of the oven,  slathering them with gobs of butter and homemade strawberry jam, and giving them to us kids to eat.  And man…did we eat!  Back then I never paid any attention to grandma’s bread baking process, and to be honest all I really remember is having to wait FOREVER for the dough to rise.  FOR-EV-ER.  But as I got older my impatience subsided…kind of… and my interest in baking began to increase.  I asked grandma for her bread recipe.  She said the recipe was her mother’s, and that she’d love to teach me how to make it.  So one day while my cousin was home from college for Christmas break, grandma came over and taught us both how bread dough should feel when you’ve added enough flour.  She taught us how to shape the rolls and loaves and most importantly, how to make cinnamon rolls!   This post isn’t about that recipe though.  I’m sure sometime I’ll share it on this blog, but today is not the day.  This post, instead, is about a little bit of information grandma told me a couple weeks ago.

Mom had brought grandma and grandpa over for the day and while I was baking grandpa his lavender chocolate macarons (he loves those things!), grandma was looking though some old magazines I had.  There must have been a recipe or something that caused her to remember, I’m not sure. She told me that when her mom made bread she sometimes would save the water that she boiled potatoes in and added it to the dough instead of milk. She didn’t have the recipe, but gosh, would she like one.  Thanks to the magic of Google, I was able to fulfill her request.

Potato water, with all it’s starchy goodness, really adds some nice moistness to the dough.  The rolls came out pretty light and they tasted like little pillows of pure bliss.  One note, if anyone decides to try this wonderful recipe, you should only refrigerate potato water for about 24 hours.  If you keep it any longer it may sweeten and really mess with the taste of your bread.   Another quick note I have about bread baking is that anyone can do it!!!  It’s so easy and really doesn’t take a lot of time at all.  Less than 75 cents for a loaf of bread sounds pretty awesome too, doesn’t it!?

The Recipe

Potato Dough Rolls (adapted from The Kitchn)

(I made 12 big rolls.  This could easily make 15-20 though)

  • 1 cup boiling potato water
  • 1/2 cup sugar
  • 1 teaspoon sea salt
  • 1/2 cup butter, softened
  • 1 teaspoon lemon or orange zest (optional)
  • 2 tablespoons warm water
  • 1/2 teaspoon sugar
  • 1 package dry yeast
  • 2 eggs, beaten
  • 4 cups flour (I used closer to 5 1/2)

Directions

  • In a big bowl whisk the boiling potato water, 1/2c. sugar, salt butter and zest together and let cool.
  • In a separate, little bowl combine the warm water, 1/2 teaspoon sugar and yeast. Let it sit and mingle for about 10 minutes or until foamy. (*note* when adding live yeast to warm water, make sure the temperature of the water doesn’t exceed 140 degrees F.  It’ll kill your yeast.  Also, I usually skip this proofing step and throw all my wet ingredients together first and then add the yeast, sugar and flour.  I’m just a bread bakin’ rebel, I guess.  I’ve never had problems doing it this way but someday I’m sure my yeast will have entered into retirement and my bread won’t rise properly.  So if you don’t want to risk it…proof it!).

Proof (haha) that my yeast is good!

  • In a large bowl whisk the potato water mixture and the yeast mixture together. Add the eggs and 2 cups of the flour. Whisk well, then stir in the other 2 cups of flour with a wooden spoon. The dough should be a little on the sticky side.  I didn’t knead it, and instead left it sit on the counter for a couple hours to rise.  The original recipe said to cover and refrigerate it, up to several days.  That’s a good idea…but I want it now!  I’m all about the instant gratification.
  • When you want to bake them, shape into balls and place side by side in a greased 9×13 pan (I used a cookie sheet lined with parchment paper). Coat hands lightly with flour to roll. Let’s talk about shaping the rolls, quick.  I want to show you Grandma R.’s way of doing things.  Grandma pinches off a piece of the dough and quick sets it in a bowl of flour.  Don’t roll it around in there, you just want a little extra so the dough won’t stick to everything.  Then she makes a circle with her thumb and her pointer finger.  She simply pushes the dough through the hole.

view from the top

view from the bottom, after the dough has been pushed through

This creates something called a “gluten cloak”…and that’s exactly what you want!  You’ll get a nice smooth roll with the untidy ends tucked underneath.  Put the rolls on the cookie sheet or in the pan and then lightly press down on them.  This will also help with the shaping.

  • Let rise, covered until doubled.

ready to rise!

Ready for the oven

  • You may want to brush with milk or cream before baking, or a mixture of egg yolk and milk or water to create a shiny roll.  I don’t do that, instead I brush each roll with ghee when it’s done cooking, not before.

ghee = Indian style clarified butter. Use real butter if you don't have this little jar of awesomeness in your pantry...it'll do the trick.

  • Bake at 375°F for about 20 minutes, depending on size of rolls.  **Oops!  I didn’t read this part of the directions.  I baked mine at 350 degrees F for about 17 minutes.  They turned out fantastic!**

After all that cake baking…

bottom layer crumb-coated!

I realized I hadn’t eaten anything all day except a couple tastes of frosting and cake batter….quality control, you know? I was super excited to take a shower and sit down to a glass of tea and 1/2 a roll smothered in strawberry jam…

I deserved it! 🙂

After I scarfed down my roll, my brother called.  He and his wife stopped over for a little while.  My nephew, Nathan, was with them too.  I haven’t seen him in a long time and I couldn’t believe how cute he’s gotten!  Here, take a look…

Michael with Nathan

I was too busy taking pictures of Nathan that I didn’t catch anyone eating the rolls, but I assure you..rolls were eaten (Piyush had 3 in one sitting!).  And they were enjoyed by all!